Monday, March 13, 2023

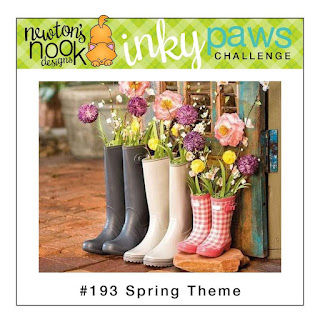
Inky Paw's Challenge 193 - Spring Theme


Hello Inky Paws Fans!

We are at the halfway point of this current challenge.

Here is my take on the challenge.


For this challenge I used the following Newton’s Nook Design’s product.

 Tulips

Basketweave Stencil

Oval Frames Die Set

A7 Frames and Banner Die

Frames and Flags Die Set

I started this card by making a card base using the

 Large Scalloped Rectangle in the Frames and Flags Die Set.

To create the card front, I used the Basketweave Stencil

My colors of choice Saltwater Taffy and Picked Raspberry.

With the stencil adhered down to white cardstock,

I blend my colors staring at each end to meet in the middle.

I pulled off the stencil and put the card stock aside to dry.

Next, I stamped, colored, and die cut out the Tulip for the front of the card.


I also die cut out an oval out of vellum using the Oval Frames Die Set.

My basketweave card front is now dry, and I die cut this out using the Large Scalloped Rectangle.

 This is going to give me a nice, shaped card when finished.

To make sure that you can see thru onto the background, I adhered the tulip to the

oval vellum shape first and then used the shadow of the tulip to adhere to the front of the card.

To create the sentiment for the card I used the round banner from the

A7 Frames and Banner Die.

I stamped on my sentiment toward one end and carefully trimmed

the other end of the banner to fit behind the tulip.

I carefully lined up my card front to the card base and glued everything together.

For I final touch I added on some matching enamel dots and added

 a bit of shimmer pen of the top of the tulips.

This completes my take on this challenge.

I Hope this gives you a bit of inspiration for your next project.

Make sure you share your projects by using the link in

the challenge picture above.


You could be.


OR


to receive a $20 Store Credit to Newton's Nook Designs!

using random.org

    Are you social?

Follow me on Instagram

at 2.sistersproject

and

Newton’s Nook Designs

Also use the following hashtags

#inkypawschallenge

#newtonsnook

#newtonsnookdesign


Thanks so much for visiting.


 STAY CRAFTY.

DIANE


Monday, March 6, 2023

Inky Paw's Challenge 193 - Spring Theme


Hello Inky Paw’s Fans!

We have a NEW challenge coming your way.

Here is my take on the challenge.


For this challenge I used the following Newton’s Nook Design’s product.

Captivated Kittens

Gnome Garden Stamp Set

Oval Frames Die Set

Springtime 6x6 Paper Pad 

This card started out as scrap.

I had a bunch of unused card bases that I have had in my stash for a while,

 and bits and pieces of card stock from all my Newton’s Nook Paper.

I started pairing up card with printed paper to see how much I could use up.

I ended up with 25 different card bases that I could us with future projects.

As I was going thru the stack that I created, this card base caught my eye.


The butterfly paper come from the Springtime 6x6 Paper Pad.

I just love all the colors.

I knew that I had to use the Captivated Kittens stamp for this card.

Since I already has a card base I stamped, colored and die cut out the kitten I wanted to use.

I created a background by using the small scalloped oval from the Oval Frames Die Set.

 I also hand cut a banner with pink cardstock for my sentiment.

I attached my oval to the front of my card. I placed my banner behind

my image and added both pieces to the front of my card.

I needed butterflies to complete the look.


After sorting thru my Newton stamps, I found the butterflies.

 that match the best in the Gnome Garden Stamp Set.

 I wanted a large selection of color choices so I  stamped,

colored and die cut a bunch of the butterflies.


 I chose the best colors for my card,  and added a few to the front.

I also stamped butterflies on the yellow card base.

To finish this card I got out my Stickles and added some bling to the butterflies.

I also added a few gems to draw your eye in.

This completes my take on this challenge.

I Hope this gives you a bit of inspiration for your next project.

Make sure you share your projects by using the link in

the challenge picture above.


You could be.


OR


to receive a $20 Store Credit to Newton's Nook Designs!

using random.org

    Are you social?

Follow me on Instagram

at 2.sistersproject

and

Newton’s Nook Designs

Also use the following hashtags

#inkypawschallenge

#newtonsnook

#newtonsnookdesign


Thanks so much for visiting.


 STAY CRAFTY.

DIANE

Monday, February 27, 2023

Inky Paw's Challenge 192 - Sketch Challenge


Hello Inky Paws Fans!

We are at the halfway point of this current challenge.

 
Here is my take on the challenge.


For this challenge I used the following Newton’s Nook Design’s product.

Lovely Blooms (on sale now)

Heartfelt Essentials

A7 Frames and Banners Die Set

Springtime 6x6 Paper Pad

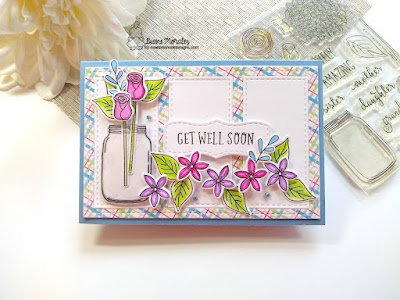
This card starts with the making of the jar from Lovely Blooms.

I stamped the jar first on regular white cardstock.

Then I stamped the jar again with Archival Ink onto clear craft plastic.

I ran both stamped items thru the die cut machine.

Next, I glue the two pieces together on three sides (not the top)

with Fabri-Tac to create a see-thru jar for my flowers.


Next, I stamped out all the flowers and stems that I thought that I would use for this card.

Once everything is colored and die cut, I started the assembly of my card.

The first thing I did was to chose my paper from the Springtime 6x6 Paper Pad.

I just love this colorful plaid for the outside of my A7 Frames frame.

For the inside panels of the frame, I just went with white cardstock.

I adhered both parts of the panel to the front of a card base.

I also assembled the flowers for the jar that I placed in the first frame of the panel.

Next, I stamped my sentiment form the Heartfelt Essentials Stamp Set onto my banner.

I balanced my banner next to the jar and glued that on with foam tape.

Using all the flowers that I created earlier, I stated to place them in a

 Pattern across the bottom, and then started to attach them to the card.


For a final step, I added on some matching blue gems.

This completes my take on this challenge.

I Hope this gives you a bit of inspiration for your next project.

Make sure you share your projects by using the link in

the challenge picture above.


You could be.


OR


to receive a $20 Store Credit to Newton's Nook Designs!

using random.org

    Are you social?

Follow me on Instagram

at 2.sistersproject

and

Newton’s Nook Designs

Also use the following hashtags

#inkypawschallenge

#newtonsnook

#newtonsnookdesign


Thanks so much for visiting.


 STAY CRAFTY.

DIANE