Tuesday, May 31, 2022

Ink Blot Shop Week Three


Hello Everybody!

My name is Diane Morales, and I am so excited

 be your guest designer for the month of May

 Here at the Ink Blot Shop.

This is my final project to share with you, and it is a fun one!


Funny Face

Greeting to You

Flair Greetings

This is a fun and simple card to make.

I started with the circle shape from the Flair Greeting stamp Set.

I thought this would make an excellent spot for the Funny Face Stamp Set.


The idea was to make a his and hers card to give to my husband.

Once the circles were stamp down, I stamped on my faces and colored.

Next, I stamped a heart above the faces and a sentiment

from the Greeting to you stamp set.

With the panel finished, I die cut it square.

I also die cut out a square of fun foam and glued that behind my panel.

To finish this card, I created a basic A2 Card base.

Using some leftover card stock in pink and blue, that I trimmed

 down to 1 ¾ inch I glued each strip to the card front.

I added the popped-up panel to the front of the card.

I finished this card by adding Stickles to the heart shape.

Once the Stickles dry, my card was ready for an envelope.

Thank you so much for joining me for this week card.

A huge shout out to Tifany at the Ink Blot Shop for allowing

me to show my take on her awesome stamps.

Speaking of awesome stamps, you can find the stamps

 I used and all the other wonderful products at

THE INK BLOT SHOP

Thanks for stopping by

Diane


Monday, May 30, 2022

Inky Paw's Challenge 174 - Sketch Challenge


 Hello Inky Paws Fans!

We are at the halfway point of this current challenge.

Using the challenge sketch, I created this card.


For this challenge I used the following Newton’s Nook Design’s product.

(NEW) Dog Silhouette Die

(NEW) A Dogs Life 6x6 Paper Pack

Oval Frames Die Set

Frames and Flags Die Set

To start my card, I selected 3 different pieces of paper

 from the (NEW) A Dogs Life 6x6 Paper Pack.

 Yes! I am using dogs! (don’t tell my kitty girls)

I decided on the green paw prints and polka dots.

I just love these prints against the gray bone prints that I am using in the background.


Speaking of the background, I created this using the Frames and Flags Die Set.

I also used this die set to make my card shape, because I LOVE A SHAPPED CARD!

To create the oval element, I used the Scalloped Oval in the Oval Frames Die Set.

I die cut this out the scalloped shape first and then used the next size down oval complete the frame.

I used vellum to create a backing for the frame so that 

the frame does not take away from the background.


Next, I die cut my dog silhouette out of navy-blue card stock and added that to the frame.

To finish my card, I stamped my sentiment to the upper left side and added

 gray pearls to create the across element of the sketch. 

and that completes my take on this challenge

Now it is your turn!

Show us your take on our fun color challenge

DON’T FORGET

Share your projects by using the link in

the challenge picture above.

You could be


OR


to receive a $20 Store Credit to Newton's Nook Designs!

using random.org

                                                       Do you use Instagram?            


   #inkypawschallenge

#newtonsnook

#newtonsnookdesigns

Thanks so much for dropping by.


STAY SAFE AND STAY CRAFTY.

DIANE


Wednesday, May 25, 2022

Anything Goes - Simon Says Stamp Wednesday Challenge


THIS WEEK’S THEME AT THE

Simon Says Stamp Wednesday Challenge

ANYTHING GOES

Featuring products by

CLEARLY BESOTTED

You do not have to use the featured company to join in.

But… If you have some of their product in your stash

We would LOVE to see them used.

Here is my take on this challenge.
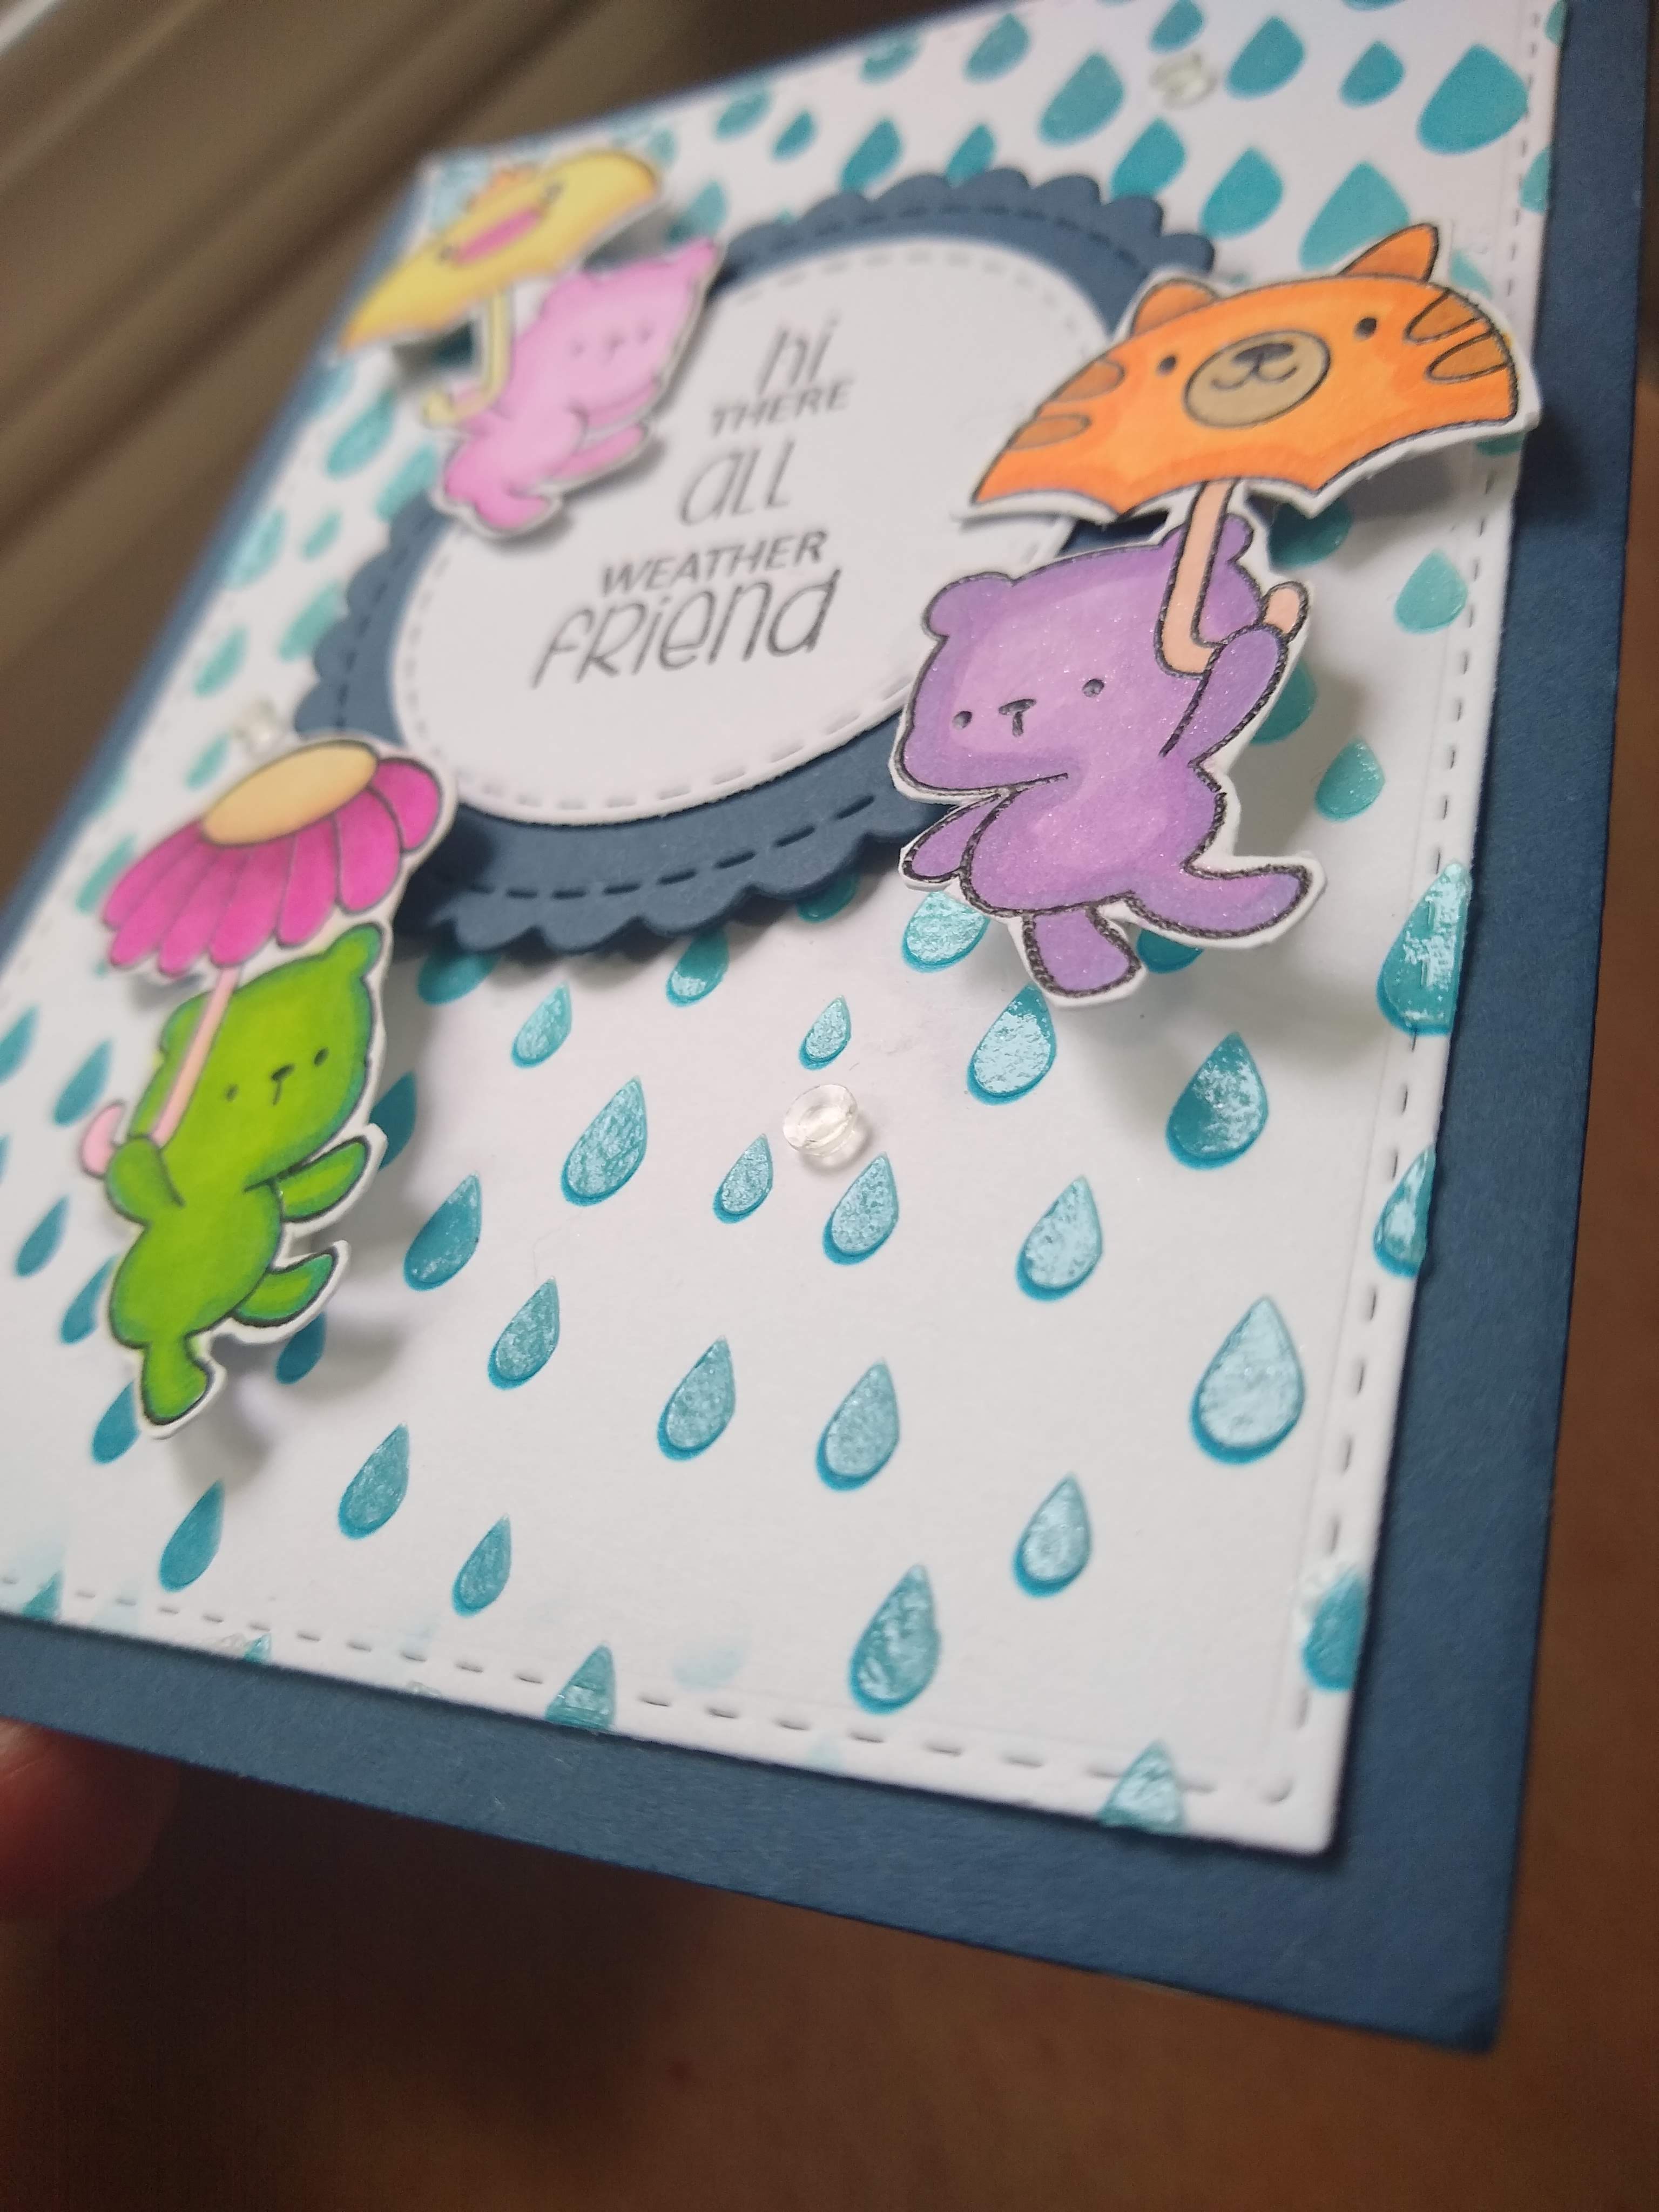

 For this card I used the following product

Whatever the Weather Fun Clear Stamp Set

Let’s get started on this card.

First thing I did was to ink up a piece of white cardstock with

 Salty Ocean distress ink and the Raindrops stencil.

I used my heat gun to quickly dry the ink before going on to the next step.

I opted to die cut the rain drops out first with my Stitched rectangles before adding gloss to the drops.

Once the card front was die cut out, I carefully replaced the stencil

over the rain drops and smeared clear gloss texture paste over the top.


This need time to dry, so I worked on stamping next.

I chose three bears from the stamp set and inked them up.

I wanted bright bold colors, so I chose to color my bears in Care Bear Style.

 Also, Using Circle Frames Dies I created a place for my sentiment

 and carefully stamped that on the center circle.

With the gloss now dry, I created a card base and glued the rain drop front to it.

Next, I arranged my sentiment circle in the center (ish)

I added on my bears to the front with foam tape.

Added some shine to my bears with a shimmer pen.

For a last touch, a bit of clear gems to add interest.

This completes my take on ANYTHING GOES

Featuring CLEARLY BESOTTED

I almost forgot the good news!


The lovely folks over at Simon Says Stamp are generously giving away

a FABULOUS $25 voucher to shop at the  Simon Says Stamp Store! 

All you must do is take out your crafty supplies,

 make something following this week’s prompt,

and add a link in the Inlinkz at the bottom of this post!

You can join 5 times so you could have 5 chances to win! How AWESOME is that!!

All winners are chosen randomly, so everyone has an equal chance to win!


GOOD LUCK TO EVERYONE!


Like the products I used.

I have direct links to everything below.


Thanks so much for stopping by.

Sending HUGE Hugs

Stay Safe and Stay Crafty

Diane


HERE ARE WHAT I USED TO CREATE THIS CARD

Whatever the Weather Fun by Clearly Besotted

Raindrop Stencil by Newton’s Nook Designs

Circle Frames Die by Newton’s Nook Designs

Stitched Rectangles by Simon Says Stamp

Soft Navy Card Stock by Simon Says Stamp

#120 White Card Stock by Simon Says Stamp

Salty Ocean Distress Ink by Ranger Ink

Onyx Black Versa Fine Ink by Tsukineko

Clear Gloss Texture Paste by Ranger Ink

SpectrumNoir Classique Markers (color in the image)

Clear Overlay Pen Sparkle Pen by Spectrum Noir

Big Momma FoamTape by Simon Says Stamp (to pop up the image)

Gems by Little Things from Lucy’s Cards


Do you use Instagram?


If so, please add #ssswchallenge to your challenge entry uploads so we can see them on there too.

Tuesday, May 24, 2022

Ink Blot Shop Week Two

Hello Everybody!

My name is Diane Morales, and I am so excited

 be your guest designer for the month of May

 Here at the Ink Blot Shop.

Today I have this fun card to share with you!


For this card I used the following items

Fat Cats Stamp Set

Botanical Boarders 6x6 Clear Stamp Set

Shape cards are one of my favorites to make.

For this card I stared with a basic circle die.

I stamped the tulips from the Botanical Boarders 6x6 Clear Stamp Set

across the center and started to color in the flowers.

I also added a blue shadow to keep the image grounded.

Next, I stamped and colored the Cat from the Fat Cats Stamp Set.


I made a card base from a scalloped die from my stash and pink card stock.

To assemble the card, I added my circle front to the scalloped base.

Next, I added on my cat to the front with foam tape.

I stamped on a few extra tuples around the cat.

I also stamped on a sentiment above the tulips.

Thank you so much for joining me for this week card.

You Can find the stamps I used and all the other wonderful product at

THE INK BLOT SHOP

Thanks for stopping by

Diane 

Monday, May 23, 2022

Inky Paw's Challenge 174 - Sketch Challenge


Hello Inky Paws Fans!

We have a NEW challenge coming your way.


Using the challenge sketch, I created this card.


For this challenge I used the following Newton’s Nook Design’s product.

(NEW) Cat Silhouette Die

(NEW) A Cats Life 6x6 Paper Pack

Heartfelt Meows Stamp Set

Heart Frames Die

Argyle Stencil Set

To start my card, I selected 3 different pieces of paper

 from the (NEW) A Cats Life 6x6 Paper Pack.

It took me a minute to see how I was going to layer the papers to look like the sketch.

Eventually I got the right blend, and I turned my attention to all the other details of the card.

Using the Heart Frames Die I cut out a couple of feature elements.

To have the larger heart stand out I used to part of the Argyle Stencil Set to add detail to the front

Next, I die cut out my cats from the (NEW) Cat Silhouette Die.


I added some sparkle with a glitter pen and put these pieces aside to dry.

To assemble the card, I created a card base and layered all my strips of paper on first.

I added on my hearts and a simple strip for my sentiment that

  Is included the Heartfelt Meows Stamp Set.

Finally, I added on my die cut cats and a few orange pearls complete the card.

 And that completes my take on this challenge

Now it is your turn!

Show us your take on our fun color challenge

DON’T FORGET

Share your projects by using the link in

the challenge picture above.

You could be


OR


to receive a $20 Store Credit to Newton's Nook Designs!

using random.org

                                                                                   Do you use Instagram?                                           

#inkypawschallenge

#newtonsnook

#newtonsnookdesigns

Thanks so much for dropping by.


STAY SAFE AND STAY CRAFTY.

DIANE