Showing posts with label Sky Borders Die Set. Show all posts

Tuesday, November 3, 2026

Newton’s Nook Designs Cozy Christmas Release - Day 1


Welcome Newton Nook Fans

It is cozy weather season!

To celebrate we have some fun NEW Items!


The Holiday Accessories Die Set is designed to go with the

Cat Builder Die Set or Dog Builder Die Set.


To start this card I created a gray cat using the Cat Builder Die Set.

I added sweater elements  from Holiday Accessories Die Set to make my kitty cozy.

The card base is made using the scalloped rectangle from the Frames and Flags Die Set.

To complement my cozy Kitty, I created the background using the Evergreen Stencil.

This is a simple technique where you use white ink on the stencil to create snowy trees.

Against darker card stock these tree really pop!

I used a basic rectangle shape from my stash to cut out my snowy tree background.

To create snow drift I used the Sky Boarder Die Set.

This created the perfect Wintry scene for my fluffy Kitty.

I also added splats of white paint for a fallen snow effect.

To finish this card I added candy canes to my snowy scene.


There are so many cute accessories in the Holiday Accessories Die Set.

To finish this card, I chose candy canes to add to my snowy scene.

I hope you enjoyed my take on the latest accessory set for your cat

and dog and try them out for yourselves.

Check out the links below for inspiration from our other talented designers.


Tags us Instagram a with the tags @newtonsnook 

 and #newtonsnook #nndcozychristmas26release

All  of the NEW products are available Friday, November 6th, 2026


Thanks for stopping by

Stay crafty, my friends!

Diane 


Check out the Design Team Blogs for 

more inspiration and featured project details:


Newton's Nook Designs

Larissa Heskett

Donna Idlet

Rosie Lopez

Samantha Mann

Diane Morales

Amanda Wilcox


Tuesday, February 25, 2025

Newton's Nook Designs Spring Release - Day 1

Welcome to the day ONE of our February Release

I am so excited to show you two of our fun new products

That you are going to love for spring crafting!

Today we are introducing

Easter Postage Sampler Stamp Set + Coordinating Die Set

AND

Happy Easter Die Set

I started things off with Easter Postage Sampler


Those carrots in the stamp set just got me!

The first thing I thought of was a little carrot garden.

To create this look I started with A tag made from Bookmark II Die

Simply basic blue card stock for the base of the tag because most of it is

 going to be covered with the layers of the "carrot patch".

To create a “garden” I used green stripe paper from Pastel Basics 6x6 Paper Pad

I took one piece of the card stock and divided it into two-inch strips.

Next, I use Sky Boarders Die set to create “hills” for the top of each of the strips.


Next, I chopped down all the strips.

The largest strip is 4 inches, the medium strip is 3 inches, and the final strip is 1 ½ inches.

I ran each of the strips back through the Bookmark II Die at the bottom of the die,

so that I can have a seamless look on all the layers of “garden” for my tag.

I glued all the strips down onto the front of my bookmark, leaving the

 top portion unglued so that I can insert my carrots.

Next, I stamped out my Bunny, carrots, and sentiment from the Easter Postage Sampler

I glued up the back of my carrots and slid those into my hills.


 I attached my Bunny to the front of the tag with foam tape 

and my sentiment at the bottom of the tag.

I felt like the tag needed some color, so I quickly stamped out a couple of flowers.

After coloring my flowers and cutting them out I added them to the front of the tag.

My next card features the NEW Happy Easter Die Set


This card could not be simpler than I started out by using the A2 Card Layout Die.

I chose bright colorful spring colors of card stock.

After cutting out my colors, I pieced everything together to make sure all the pieces fit.

 I then took the pieces out and using the flower stamps from the Easter Postage Sampler

Along with Versamark ink I stamped on my flowers.

After covering the flowers with clear embossing powder

 and heat setting I had this cool design to go around my centerpiece.

I created a card base out of white card stock,

The frame piece from A2 Card Layout Die. is glued onto the card first.

 All the colorful pieces are then glued back into their spot.


For the Happy Easter Die I chose black and white card stock.

After cutting the pieces out, I glued everything together and set this aside to dry.

Once dried this was added to the front of the card with foam tape.

To finish this card I added on a couple of Easter Lily stamps and a couple of white gems. 

Hope you enjoy my take on these fun new products!

All these new products will be available. Friday, February 28 

Happy Shopping!

Thanks so much for stopping by.

Stay crafty everyone!


DIANE


Enter to Win a $25 Prize!


One lucky winner will receive a $25 store credit to spend at Newton's Nook Designs online shop! The winner will be chosen at random from the collective blog posts featuring our new products this week. For a chance to win, leave comments on the Design Team Member Blog Posts (see list below) from Tuesday, February 25th through Thursday February 27th. You will not know which blog will be randomly chosen so the more you comment on the better your chances are of winning! You have until Thursday, February 27th at 9 pm ET to comment -- winners will be announced on the NND blog on Friday, February 28th.


Want another chance to win? We will be having an instagram hop on Friday with a second prize! Please join us over on Instagram on Friday, February 28th for details! 


Check out all the awesome Design Team Blogs below to enter:


Newton's Nook Designs

Donna Idlet

Larissa Heskett

Samantha Mann

Diane Morales

Farhana Sarker

Amanda Wilcox


Monday, May 1, 2023

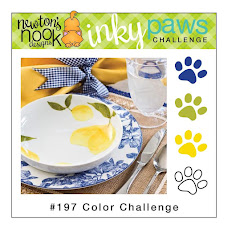
Inky Paw's Challenge 197 - Color Challenge


Hello Inky Paws Fans!

We have a NEW challenge coming your way.

Here is my take on the challenge.


For this challenge I used the following Newton’s Nook Design’s product.

Gull Friends

Sunscape Stencil Set

Sea Boarders Die Set

Waves- Shark Bites Stamp Set

Sentiment – Beach Bound


For my take on this challenge, I decided to use the challenge colors for a fun seaside shaped card.

I started this card by using the Sunscape Stencil Set.

I taped the stencil onto white card stock and inked up the yellow sunshine.

With a strip of blue cardstock, I used one of the dies from the Sea Boarders Die Set

To die cut some waves for the bottom of my card.


I wanted to add interest to my blue wave bottom so using the water stamp

from the Shark Bites Stamp Set I stamped on water ripples.

To make my shaped card I lined up my sunshine background

with the waves at the bottom inside a Basic circle die.

I taped everything down and ran everything through my die cutting machine.

This created the start of my card front.

I also used the same basic circle die to create my card base.

I started to assemble my card by gluing my card front to the base I created.

Next, I lined up the waves at the bottom with my stenciled sunshine and glued the waves down.


I stamped colored and die cut out my image from Gull Friends.

I added the seagulls to the front of my card with foam tape.

I used an off cut of my die cut waves to cover up the bottom of the pilings

To complete this card, I stamped on a sentiment from the Beach Bound Stamp Set

To the sunshine on my card front

This completes my take on this challenge.

I Hope this gives you a bit of inspiration for your next project.

Make sure you share your projects by using the link in

the challenge picture above.


For a chance to be


OR


to receive a $20 Store Credit to Newton's Nook Designs!

using random.org

    Are you social?

Follow me on Instagram

at 2.sistersproject

and

Newton’s Nook Designs

Also use the following hashtags

#inkypawschallenge

#newtonsnook

#newtonsnookdesign


Thanks so much for visiting.


 STAY CRAFTY.

DIANE


Monday, August 15, 2022

Inky Paw's Challenge 180 - Sketch Challenge


Hello Inky Paws Fans!

We have a NEW challenge coming your way.


Aloha Newton

Oval Frames Die Set

Sky Boarders Die Set

Clouds Stencil

Summertime 6x6 Paper Pad

Using the sketch challenge, I created this card

To start this card, I stamped out my image from the Aloha Newton Stamp Set.

I kept the colors tropical when coloring the image.

I used the scalloped oval from the Oval Frames Die to create the oval element on the sketch.

Using the Clouds Stencil and Distress Ink I created a fluffy blue sky on the oval.

I also die cut a second Oval out of kraft cardstock.

Using the Sky Boarders Die I die cut off part of the bottom to become my sandy beach.


To make this more beach like, I added Distress Ink speckles and darken the edges.

I created a card base, out of basic white card stock.

I chose three different cardstocks from the summertime 6x6 paper and glued them to my card base.

Next, I assembled all my elements for the oval.

I added my image from the Aloha Newton Stamp Set to the oval with foam tape.

To finish the card, I created a simple sentiment banner and added that to the front of the card.


Share your projects by using the link in

the challenge picture above.

You could be


OR


to receive a $20 Store Credit to Newton's Nook Designs!

using random.org

                                              Do you use Instagram?                                                

#inkypawschallenge

#newtonsnook

#newtonsnookdesigns

Thanks so much for quickly visiting.


STAY SAFE AND STAY CRAFTY.

DIANE