Showing posts with label Banner Duo Die Set. Show all posts

Thursday, June 12, 2025

Newton's Nook Mini Seaside Release


IT’S SUMMERTIME!


We are starting out summertime crafting with this fun NEW stamp and paper pad.

 Using our NEW products I created this card.


I am totally obsessed with the Seaside Paper Pad!

I absolutely love the colors they are perfect for summertime.

To start this card I chose the grey sand dollar paper from Seaside Paper

I created the base of the card using the scalloped from

the Circle Frames Die Set along with grey card stock.

I used a basic 3 1/2-inch circle die from my stash to make the card front.

Next, I stamped and colored the image from Newton’s Sand Dollar Stamp Set

I love that the sand dollar image is so large that you can add a bunch of fun details.


For my details I use blue and gray gel pen to add dots, I also used a bitter shimmer pen.

Once I was happy with my image I die-cut this image out and

added it to the front of my card with foam tape.

To create a place for my sentiment I use the square edge banner from The Banner Duo Die Set.

To complete this card I added on a couple of clear gems.

Super excited to show you my second card!


The idea came from the yellow the yellow glitter card stock

in the Cheerful Brights Glitter Card Stock.

This color has a sand-like quality to it.

I die cut this paper out using the Frames and Tags Die Set.

I also cut out a piece of white cardstock that I will use for backgrounds.

I glued my die cut glitter card stock to a yellow card stock base.

Two of my panels I kept white, the third panel stayed yellow glitter.

Next, I stamped and colored my image from Newton’s Sand Dollar Stamp Set

I also stamped extra seashells.


I added my image to the front of my card with foam tape.

I scattered the shells around and added them to the front of the card with foam tape.

In between the shells, I added pearls and gems to make things sparkle.

I finished this card by stamping the sentiment in the upper right panel.


I hope you enjoyed my cards!

Our fun new products will be available.

Friday, June 13

Have an awesome day!

Stay crafty my friends


DIANE


Enter to Win a $25 Prize!

One lucky winner will receive a $25 store credit to spend at Newton's Nook Designs online shop!

The winner will be chosen at random from the collective blog posts featuring our new products today. 

For a chance to win, leave comments on the Design Team Member Blog Posts today (June 12th). 

You will not know which blog has been chosen so the more you comment on the better your chances are of winning! You have until Sunday, June 15th at 9 pm ET to comment.  

Winners will be announced on the NND blog on Monday, June 16th.


Check out all the awesome Design Team Blogs below to enter:

Newton's Nook Designs

Larissa Heskett

Samantha Mann

Diane Morales

Farhana Sarker

Amanda Wilcox

Zsofia Molnar


Thursday, June 20, 2024

Newton's Nook Designs June Release - Day 4

Hello Everybody!

It is day 4 of our New Release!

I know you're going to have so much fun with this new stamp set.

Farmer Newton

Using this stamp set I came up with this card.


To create this card, I started with a base of the NEW Hexagon Frames Die and

The picnic Plaid red paper from the Farmyard Paper Pad.

I created a card base using basic red card stock and hexagon dies.

I used the Farmyard Plaid Paper as my card front with a white hexagon die on top.

I just love how awesome these hexagon dyes are!

Next, I colored my images from Farmer Newton.

Of course, my farmer kitty cat had to wear denim!

Once everything was colored in and die cut out, I placed my haystacks on the card first.

I added foam tape to the back of Farmer Newton and placed him in the center of the haystacks.


Using the sentiment that is included in the stamp set, 

I created a banner using Banner Duo Die Set.

Farmer Newton is such a cute stamp set and using it with hexagon dyes just made the cutest card.

I hope you enjoyed my take these latest items that we have on this release.

This and all the other fun latest items are available June 22nd.


Happy Shopping!


Thanks so much for stopping by.

Stay craft everyone!


DIANE


Enter to Win a $25 Prize!

We will be choosing two lucky winners to win a $25 store credit for

 Newton's Nook Designs online shop!

 The winners will be chosen at random from the collective blog posts

 featuring our new products this week. 

For a chance to win, leave comments on the Design Team Member Blog Posts 

(see list below) from Monday June 17 through Thursday June 20th. 

You will not know which blog has been chosen so the more

 you comment on the better your chances are of winning! 

You have until Thursday, June 20th at 9 pm ET to comment -- 

winners will be announced on the NND blog on Friday, June 21st.

Check out all the awesome Design Team Blogs below to enter:

Newton's Nook Designs

Donna Idlet

Larissa Heskett

Samantha Mann

Diane Morales

Farhana Sarker

Amanda Wilcox 


Friday, February 9, 2024

Newto's Nook Designs Lucky Release


Hello Everybody!

It is a delightful day here at Newton’s Nook Designs.

We have three fun new crafty goodies that are sure to get your paw’s Inky!

Shamrocks Hot Foil Plate

Newton’s Lucky Clover Stamp Set

Lucky Dog Stamp Set

First up the Shamrocks Hot Foil Plate.


I had a blast using this hot foil plate with

various kinds of foil and cardstock combinations.

My first foiling was gold shamrocks onto green cardstock.


This was my first pass on the new Hot foil Plate, so the shamrocks were not perfect.

I LOVED the look of the imperfection and embraced it by

creating a tag using the Fancy Edges Tag Die.

After the tag was die cut out, I inked the edges with Rustic Wilderness Distress Ink.

I used the small, stitched oval from Oval Frames Die Set for the itty-bitty

stamped images from Newton’s Lucky Clover Stamp Set.


The white cardstock breaks up all the green and shows off the images.

I finished this tag with a hand cut sentiment banner and gold ribbon.

Speaking of Newton’s Lucky Clover Stamp Set, I decided to be bold.

With my Hot Foil Machine warmed up.

I was able to foil white shamrocks on to GOLD cardstock.

This is the background of my next card


I stamped and colored the images from Newton’s Lucky Clover Stamp Set.

I created a banner using the Banner Duo Die Set.

Once I got the banner level at the bottom of my card, I added on Newton

and extra shamrocks for good luck.

The gold front on this card is just bold and blingy and I just love it so much.

For my final card, I brought things back to Spring.


The doggy in the Lucky Dog Stamp Set is just so cute!

I used paper from the Spring Blooms Cardstock that was

die cut out with rounded edge stitched die from Frames and Flags Die Set.

I glued this to a matching green card base.

The scalloped circle die cut from the Circle Frames Die Set

in white cardstock breaks everything up and I as a

great spot for the doggy from Lucky Dog Stamp Set.

I did a bold thing by stamping my sentiment directly on the printed paper.

A couple of white gems complete this card.

I hope you enjoyed my take on the fun latest items that we have on this release.

The best part is that everything is available NOW!!

Use the links in this blog post to grab your goodies!


Happy Shopping!


Thanks so much for stopping by.

Stay craft everyone!


DIANE

Tuesday, December 19, 2023

All that gold!

 Hello Newton’s Nook Fans!

sharing this fun golden card with you today!


For this card I used 

Heartfelt Holidays

Heart Frames Die Set

Holiday Greeting Hot Foil Plate

Banner Duo Die Set.


To start this card, I used the Heart Frames Die Set and created a card base.

I decided to make this card bold, so I grabbed some gold card stock that I had in my stash.

I used the gold card stock to create the card front and

 later using the Banner Duo Die Set a banner for a sentiment.


I stamped and colored the Heartfelt Holidays.

I die cut this out using the Scalloped Heart from Heart Frames Die Set.

I assembled the card using foam tape to pop up the scalloped part of the heart.

I was careful not to smudge the gold cardstock as I placed to onto the card front.

Next, I used Holiday Greeting Hot Foil Plate with white foil to create my sentiment.

As I mentioned above, I used the same gold cardstock to create my banner.

To finish this card, I used gold stickles on the berries that are on the card front.


Stay crafty my friends!

Diane


Tuesday, September 12, 2023

Day 2 - Newton's Nook Designs Halloween Release


Hello Newton’s Nook Fans!

For the second day of our September Release

We have TWO amazing products for you to get your paw’s inky with!


Ghostly Good Times + coordinating dies

and

Spooky Line Stencil

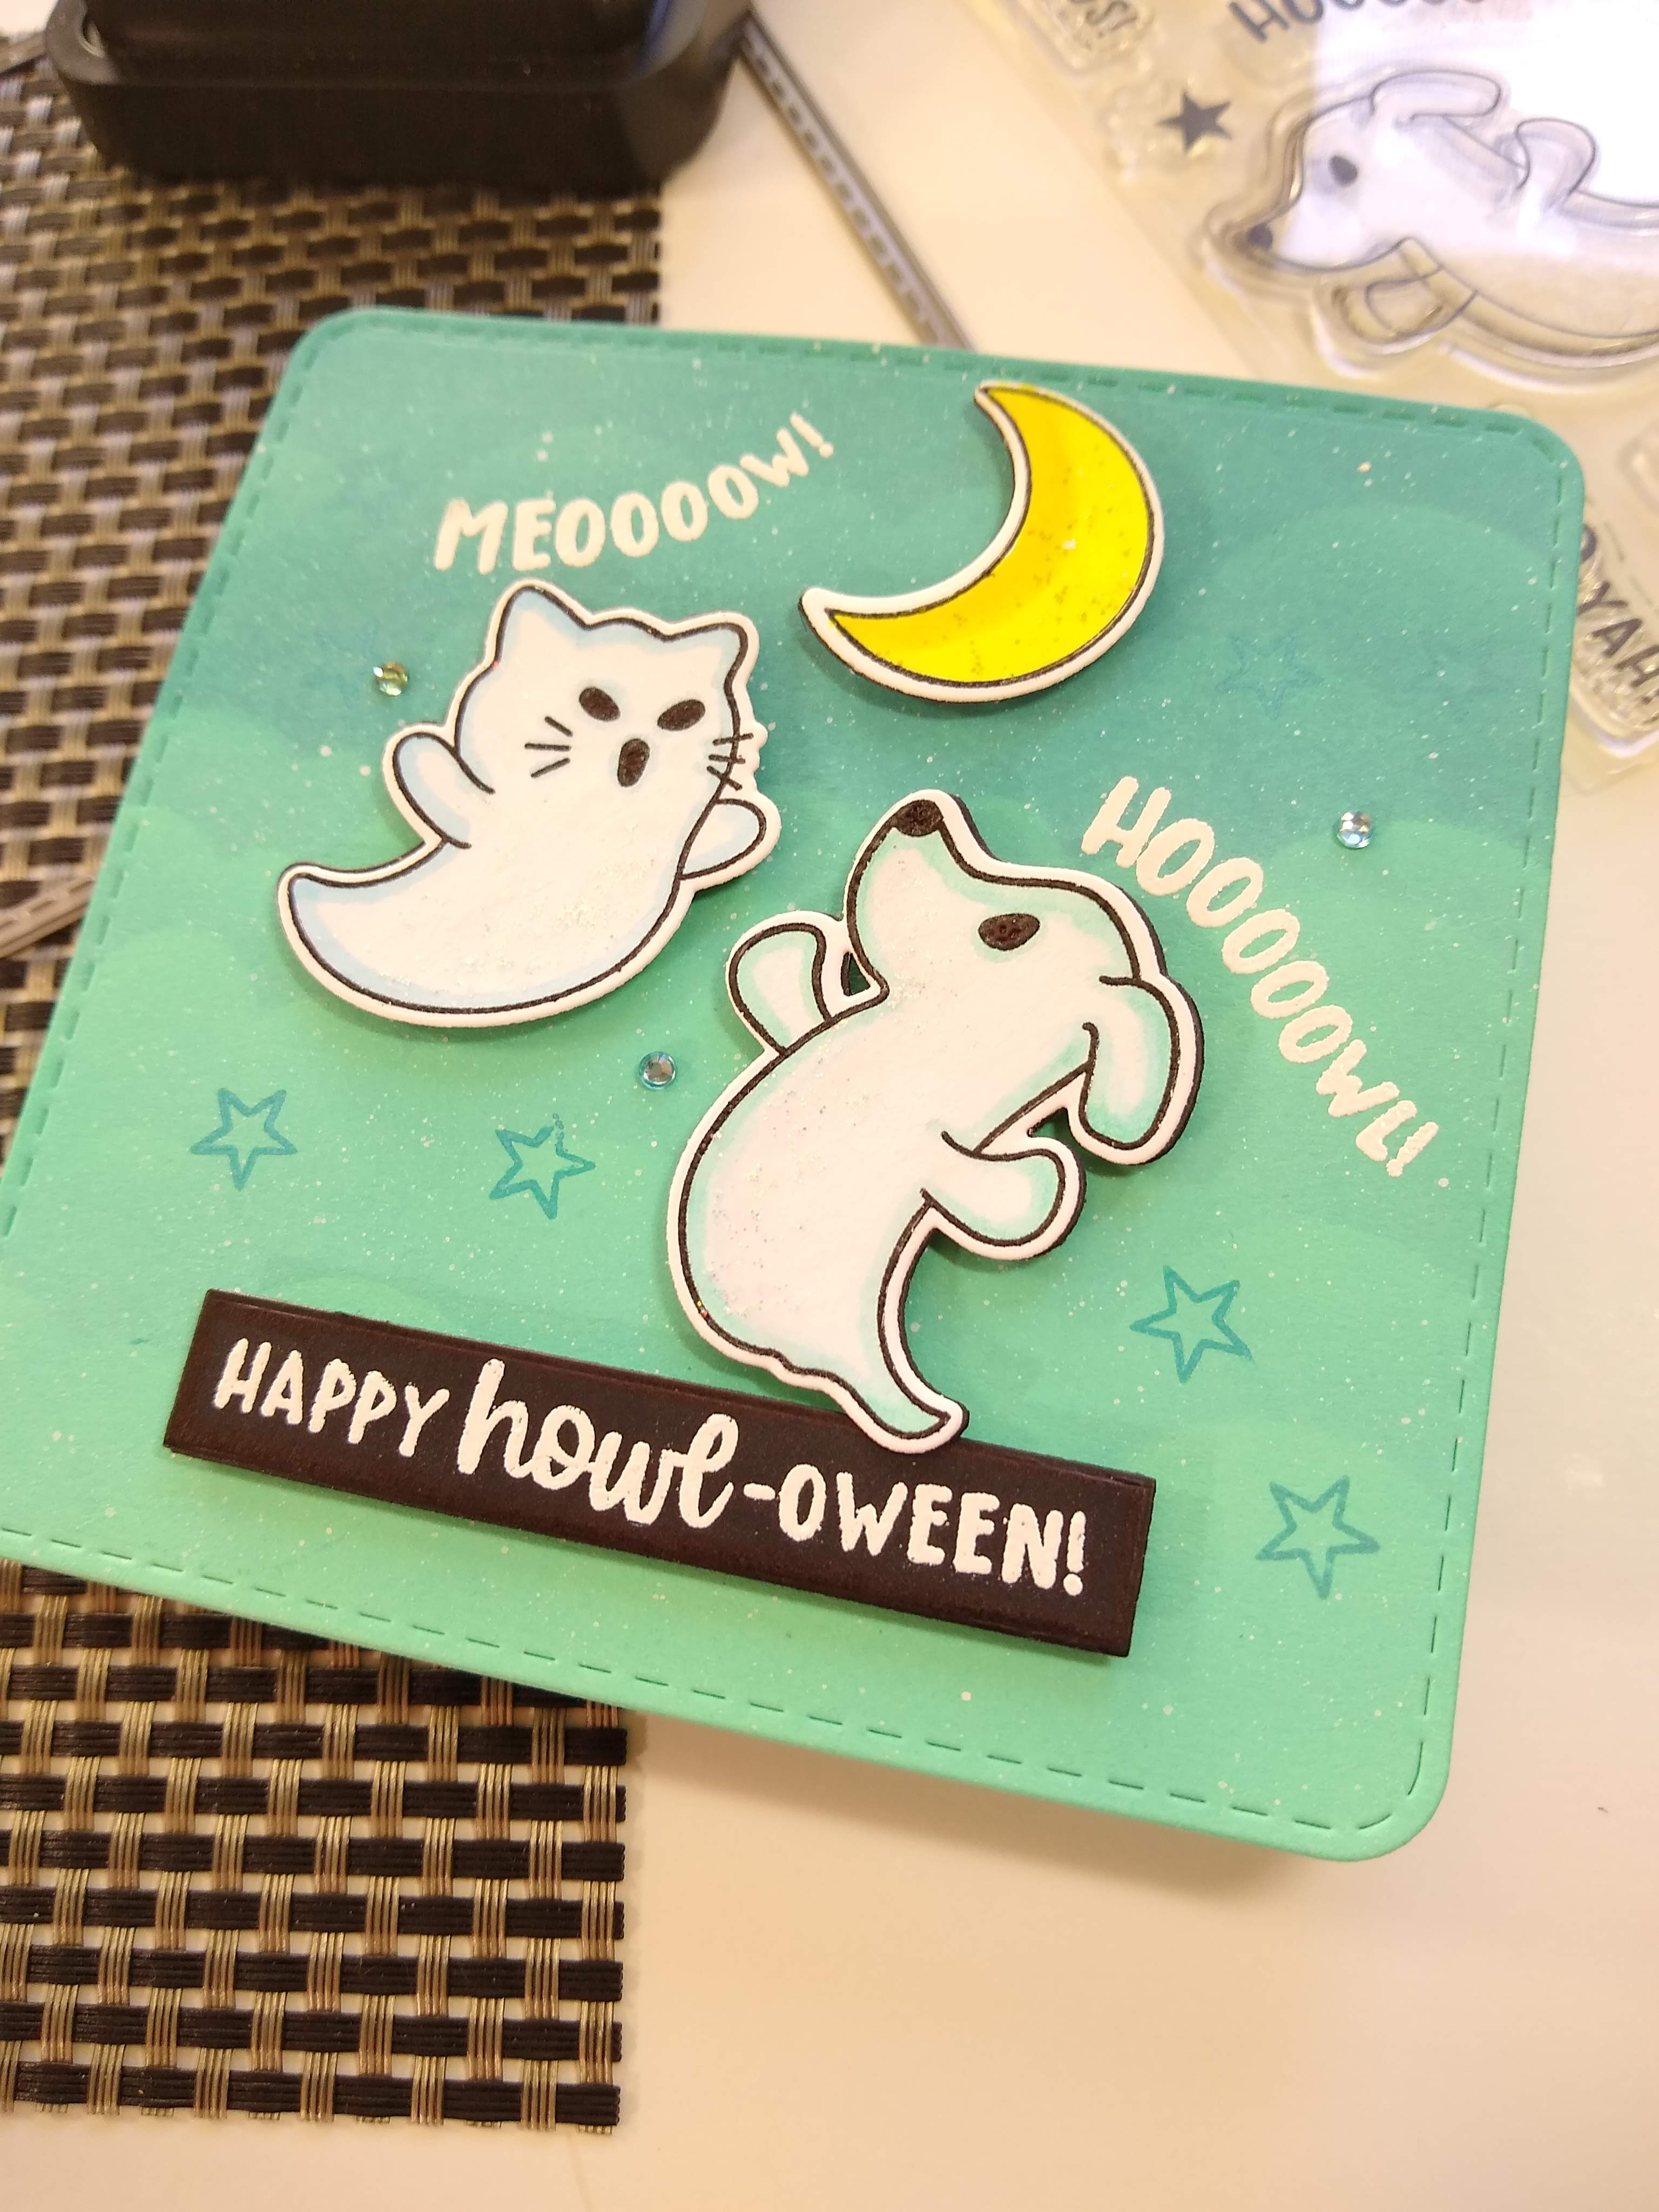
Using the Ghostly Good Times Stamp Set and dies


 I came up with this card


On a piece of white card stock, I used the Cloud Stencil and the following Distress Oxide colors.

Salvaged Patina

Peacock Feathers

Tumbled Glass


Using the edge of the cloud stencil, I started with the 

lightest color and blended into the darkest color.

 I kept adding color to the scene till I liked what I saw.

 Then, I used a lager blending tool to smooth out the scene.

Placed my ink blending aside to dry and worked on my stamps

Stamping out the images from Ghostly Good Times.

I colored my images using light color blues that match the background I just created.

I used Stickles to paint on shine and texture to the moon and ghost.


The background was now dry enough for me to die cut out using the Frames Squared Die Set.

I also created a card base with the same die set.

After figuring out the placement of the stamps, 

I attached them to the front of the card with foam tape.

To add some details to the background, I stamped on stars that are included in the stamp set.

I also stamped on sentiments that I heat embossed with white embossing powder.

The final touch is a banner created with the Banner Duo Die Set, and a few matching gems.


The next item in the release

Spooky Line Stencil


 Here is my take on this stencil


 I am out of practice using stencils, so I kept my image CAS (clean and simple)

I started off by inking my tombstones and tree black soot Distressed

I taped off the moon with making paper and inked up my stars using Salvaged Patina Distressed

I then removed that mask and masked up the stars around

 the moon and inked the moon with Scattered Straw Distressed.

Finally, I moved the stencil one last time and inked up the ghost using Lost Shadow Distressed

When the ink was dry, I cut my paper down to 3 x 6 slimline.

To add some bling, I placed the stencil back over the moon and added Starshine Stickled Glitter gel on top.


I also added tiny drops of Unicorn Stickles around the stars.

Once all the stickles were dry, I created a card base for my front and attached the two pieces together.

I used the NEW Spooky Sentiments Hot Foil Plate and Banner Duo Die Set to create a banner at the bottom.


Would you like to win the “Ghostly Good Times” Stamp Set?

This stamp set will be given away to ONE lucky winner!

Here's how to win: Comment on the NND blog and Design Team blogs (see list below)!

The winner will be chosen at random from the collective reveal posts.

Make sure to check out each of their blogs and comment for your chance to win.

You will not know which blog has been chosen so the more you comment on,

 the better your chances are of winning!

 You have until Thursday September 14th at 9pm ET to comment -

 winners will be announced on the blog post on Friday, September 15th.


Check out all the awesome Design Team Blogs below to enter:
 

Newton's Nook Designs

Ellen Haxelmans

Larissa Heskett

Samantha Mann

                 Diane Morales   (you are here)
Farhana Sarker
Tatiana Trafimovich

Amanda Wilcox

 Thanks so much for visiting and sharing this fun release with me.

Stay crafty my friends

Diane